
When managing virtual machines in VMware vSphere, it’s common to run out of disk space over time. Fortunately, expanding a virtual disk is straightforward, but it involves both changes in vSphere and inside the guest operating system. In this guide, I’ll walk you through the steps to increase the disk size of an Ubuntu Linux virtual machine.
Step 1: Shut Down or Keep the VM Running?
vSphere allows you to increase the size of a virtual disk while the VM is powered on (if VMware Tools is installed). However, for critical systems, it’s often safer to perform this change during a maintenance window.
⚠️ Warning: Make sure the VM does not have any active snapshots. Expanding a disk with snapshots is not allowed in vSphere and will result in an error. If snapshots exist, consolidate or delete them before proceeding.
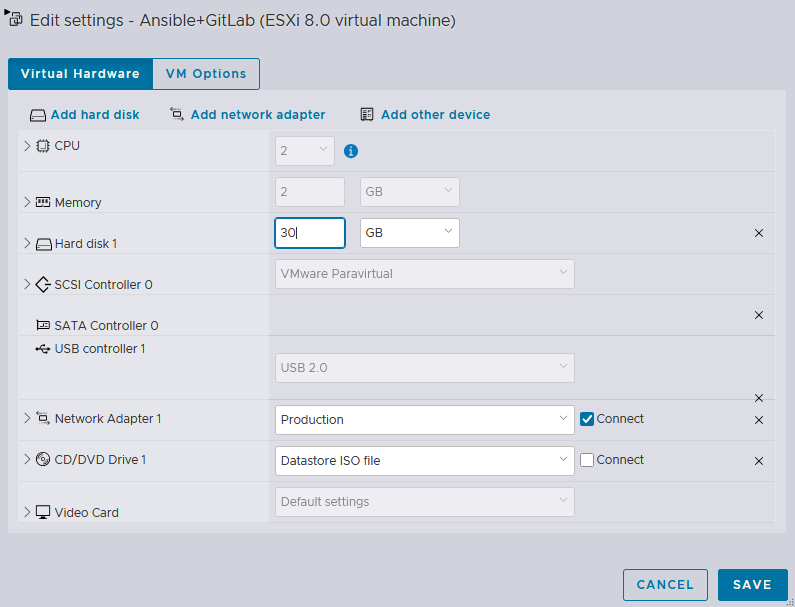
Step 2: Expand the Virtual Disk in vSphere
Log in to the vSphere Client.
- Right-click on the VM and select Edit Settings.
- Locate the hard disk you want to expand.
- Increase the disk size to the desired capacity (for example, from 15 GB to 30 GB).
- Click OK to apply the change.
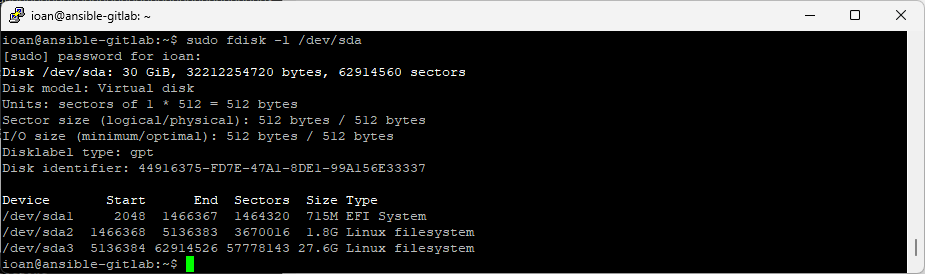
Step 3: Verify the New Disk Size
After resizing the virtual disk in vSphere, check that the system sees the new capacity:
sudo fdisk -l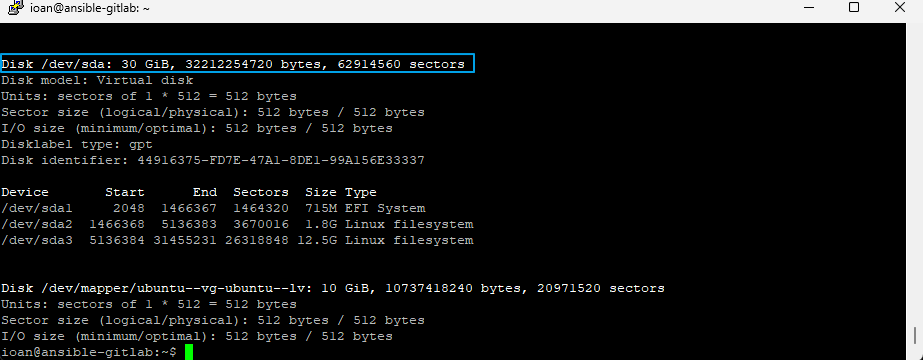
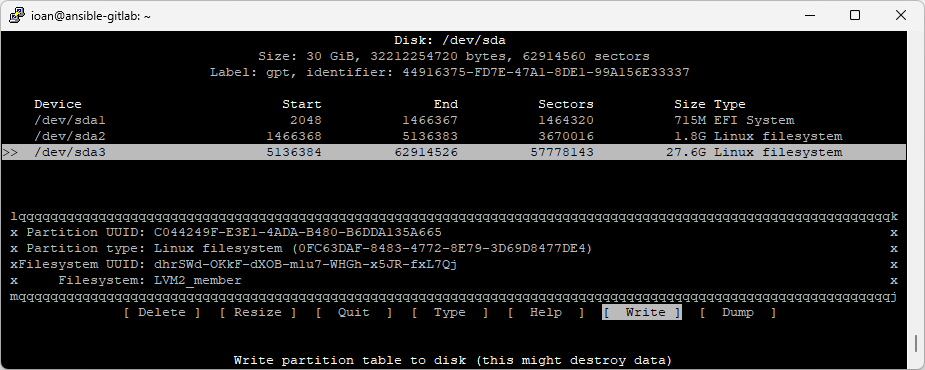
Step 4: Extend partition
Launch the partitioning tool cfdisk on your disk, select /dev/sda3 and then Resize:
sudo cfdisk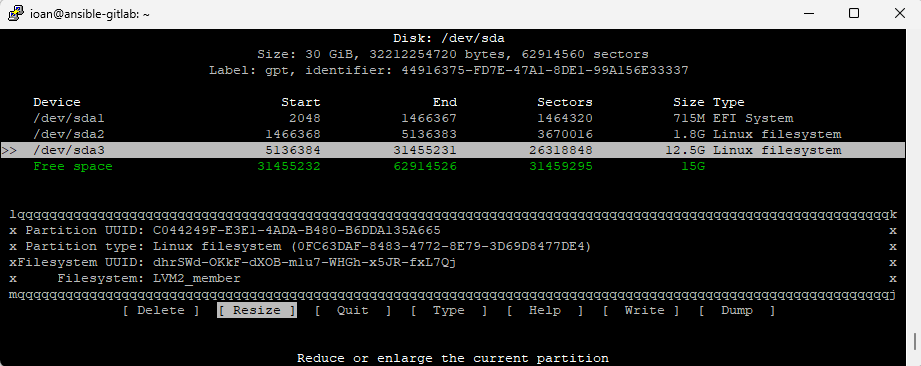
- Press Enter and the New size will be displayed
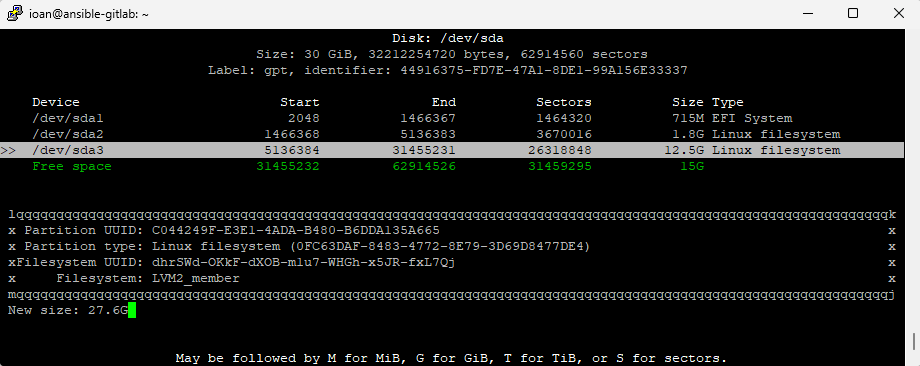
- Press Enter again, then select Write, type yes for confirmation and then Quit from the program.
5. Re-read the Partition Table
Run fdisk -l /dev/sda to check whether the partition was extended:
Step 6: Resize the Physical Volume
Tell LVM to use the extra space:
sudo pvresize /dev/sda3Check with:
sudo pvs
Step 7.1: Extend the Logical Volume and Filesystem
Get root logical volume name:
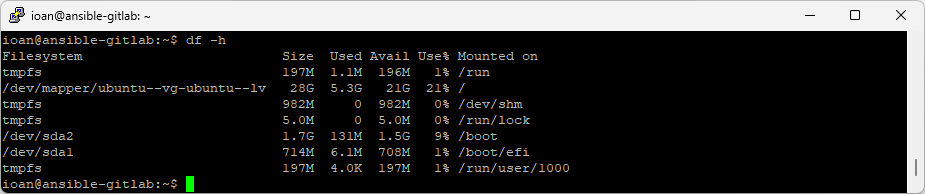
df -h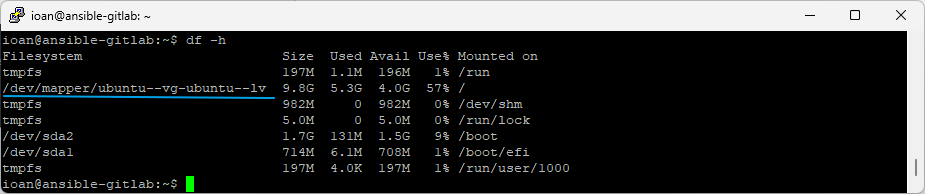
- Expand the logical volume to use all available free space:
sudo lvextend -r -l +100%FREE /dev/mapper/ubuntu--vg-ubuntu--lv- -l +100%FREE tells LVM to allocate all remaining free space from the volume group.
- -r (or –resizefs) resizes the filesystem automatically, so you don’t need to run resize2fs or xfs_growfs separately.
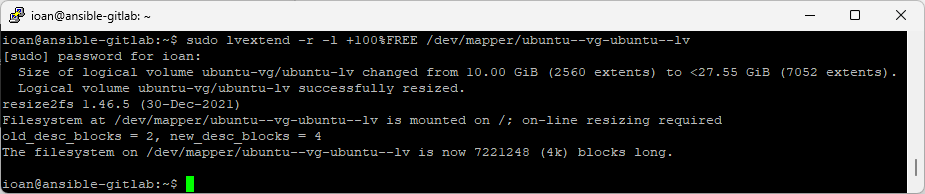
- Check with:
sudo lvs
Step 7.2: Alternative – Manual Resize
If you prefer more control, you can run the steps separately:
sudo lvextend -l +100%FREE /dev/mapper/ubuntu--vg-ubuntu--lv
sudo resize2fs /dev/mapper/ubuntu--vg-ubuntu--lv   # for ext4
# or
sudo xfs_growfs /   # for XFS
Step 8. Verify the Result
Check available space:
df -hYou should now see / using ~30G.
Conclusion
The real expansion happens after the disk size is increased in vSphere. By resizing the partition, extending the physical volume, and then expanding the logical volume and filesystem, you unlock the additional space for the operating system. LVM makes this process flexible, allowing you to adjust storage without reinstalling or migrating data, while the filesystem resize step ensures that the new capacity is ready to be used immediately.