
In the first part of this series, we built the foundation of our automation framework: a clean directory structure, proper inventories, OS-specific variable separation, secure Vault usage, and the vCenter settings that glue everything together. Think of it as laying out all tools on the workbench before touching the actual machine.
Now comes the fun part.
Before we start provisioning, there’s one important lesson we need to get out of the way — something you will absolutely run into in any real-world vSphere environment:
Windows guest customization breaks completely if your template has been manually sysprep’d.
Yes, really.
If you generalize a Windows image yourself and then let vCenter try to run its own sysprep during OS Customization, you’ll be greeted with the legendary:
“The computer restarted unexpectedly or encountered an unexpected error…”
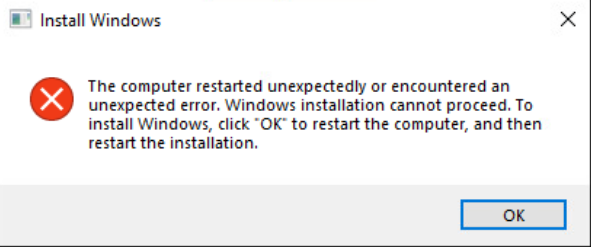
And your VM will loop itself into oblivion.
We’ve been there. We’ve stared at it long enough. Trust us — don’t do manual sysprep for templates that will be cloned with OS customization.
So, the rule is simple:
- Template that uses OS Customization → NO manual sysprep.
- Template for bare clones/labs with no OS Customization installation → manual sysprep is fine.
And one more thing — your template MUST have VMware Tools installed.
This is absolutely essential because the customization engine, IP assignment, hostname injection, and later WinRM bootstrapping all rely on VMware Tools being present and working. Without it, nothing moves.
In this post, we’ll take that clean Windows 10 template — with VMware Tools installed, but without sysprep — and automate the full provisioning workflow:
- deploying a new VM from template using
vmware_guest - setting CPU, RAM, datastore, folder, and VM name
- applying vSphere Guest Customization with static IP
- verifying the VM boots cleanly with the correct hostname and network settings
- preparing the machine for the next stage (WinRM bootstrap and domain join in Part 3)
By the end of this article, we’ll have a reproducible, fully automated Windows 10 provisioning process that works exactly like an enterprise environment — but without the clicking and praying in the vSphere UI.
Let’s get started.
Defining the VM Metadata (host_vars)
With the template ready, it’s time to give our new Windows 10 VM an identity.
One of the reasons we spent time building a clean repository structure in Part 1 is so that each virtual machine can be defined in a simple and predictable way — without touching the playbooks themselves.
In other words:
playbooks define how provisioning works, and host_vars define what we want to provision.
This separation is what allows the setup to scale later into CI/CD pipelines. A pipeline doesn’t need to know anything about VM names, IPs, templates, or network settings. It simply notices that a new host_vars file appeared and runs the provisioning workflow for that machine. Clean, elegant, and future-proof.
For our first Windows 10 client, we create a metadata file inside:
inventories/lab/host_vars/HAM01AP001.ymlThe structure is straightforward:
# Windows 10 client metadata
# Everything Ansible needs for provisioning and post-configuration

# Basic VM identity
vm_name: "HAM01AP001"
computer_name: "HAM01AP001"

# Placement in vSphere
vm_datacenter: "Datacenter1"
vm_cluster: "Cluster1"
vm_folder: "HAM-Test"
vm_datastore: "DatastoreESXi0_1"
vm_network: "Production"


# Hardware configuration
vm_cpu: 2
vm_memory_mb: 4096
vm_disk_gb: 60

# Template selection (from template mapping defined in group_vars)
os_family: "win_client"
vm_template: "{{ win_client_template }}"

# Static network configuration (used by vSphere Guest Customization)
ip_address: "192.168.1.60"
ip_subnet_mask: "255.255.255.0"
ip_gateway: "192.168.1.1"
dns_servers:
  - "192.168.1.90"
  - "192.168.1.91"

# Windows local administrator (stored securely in Vault)
windows_admin_user: "Admin"
win_local_admin_password: "{{ vault_win_admin_password }}"

# Ansible connection settings (activated after WinRM bootstrap)
ansible_host: "{{ ip_address }}"
ansible_connection: winrm
ansible_port: 5985
ansible_user: "{{ windows_admin_user }}"
ansible_password: "{{ win_local_admin_password }}"
ansible_winrm_transport: ntlm
ansible_winrm_server_cert_validation: ignore
This single file fully describes the VM from start to finish.
When the provisioning playbook runs, Ansible loads this metadata and passes it to vCenter via the vmware_guest module. After the VM boots and WinRM is enabled through our bootstrap process, the same file already contains everything needed for post-configuration tasks.
By keeping all host-specific data in one place, we avoid hard-coding anything in our playbooks and maintain a structure that is clean, scalable, and CI/CD-friendly.
This is the exact pattern used by production automation frameworks:
machine-specific data lives in inventory, automation logic lives in the playbooks.
Updating the Inventory for Provisioning
With the VM metadata defined, the inventory only needs to do one thing:
declare that this machine exists and assign it to the correct group.
That’s it.
No IP address, no credentials, no WinRM details — those all live in host_vars, where they belong.
Our inventory structure from Part 1 already includes the groups we need:
windows
└──win_clients
└──win_servers
For a Windows 10 workstation, we simply add the hostname under win_clients:
inventories/lab/inventory.yml
all:
  children:

    windows:
      children:
        win_clients:
          hosts:
            HAM01AP001:

        win_servers:
          hosts: {}

    vcenter:
      hosts:
        vcsa.racklab.local:
This is intentionally minimal.
The inventory’s job is only to:
- declare the host’s logical name (HAM01AP001)
- place it in the correct functional group (win_clients)
- let Ansible load its matching
host_vars/HAM01AP001.ymlfile
Notice what’s missing:
There is no ansible_host, no IP address, no connection settings.
Why?
Because the VM does not exist yet.
In our workflow:
- During provisioning, Ansible talks only to vCenter.
- vCenter configures the machine’s static IP through Guest Customization.
- After bootstrap enables WinRM, the VM becomes reachable — using the connection settings stored in
host_vars.
This design keeps the inventory clean, predictable, and easy to scale.
If you add 10 new host_vars files tomorrow, you simply list their logical names in win_clients, and everything just works.
Playbooks remain generic.
host_vars contain all host-specific details.
The inventory remains the lightweight index that ties everything together.
Next, we finally get to the interesting part:
The Windows 10 Provisioning Playbook
With the inventory in place and all VM-specific metadata defined in host_vars, we can finally build the playbook responsible for creating our Windows 10 virtual machine in vSphere. This is the first point where Ansible interacts with vCenter and actually produces a VM.
The goal of this playbook is simple:
- clone the VM from the correct template
- apply the static IP configuration
- set the hostname
- choose the cluster, datastore, and folder
- attach the correct network
- and ensure the VM starts successfully
All the values come from the host_vars file; the playbook itself contains zero host-specific values.
This is exactly what makes it reusable.
Create the file:
playbooks/provision/vmware_windows_client.yml
Here is the full playbook:
---
# Provision Windows 10 client VMs from vSphere templates
# All VM-specific data comes from host_vars for hosts in the win_clients group.

- name: Provision Windows 10 clients from template
  hosts: vcenter
  gather_facts: false
  collections:
    - community.vmware

  vars_files:
    - "../../inventories/lab/group_vars/vcenter.yml"

  tasks:
    - name: Collect Windows client hosts from inventory
      set_fact:
        win_client_hosts: "{{ groups['win_clients'] | default([]) }}"

    - name: Fail if no Windows client hosts are defined
      fail:
        msg: "No hosts found in win_clients group. Nothing to provision."
      when: win_client_hosts | length == 0

    - name: Clone Windows 10 VM(s) from template with static IP and customization
      vmware_guest:
        # vCenter connection
        hostname: "{{ vcenter_hostname }}"
        username: "{{ vcenter_username }}"
        password: "{{ vcenter_password }}"
        validate_certs: "{{ vcenter_validate_certs | default(false) }}"

        # vSphere placement (per host)
        datacenter: "{{ hostvars[vm_name].vm_datacenter }}"
        cluster: "{{ hostvars[vm_name].vm_cluster }}"
        folder: "{{ hostvars[vm_name].vm_folder }}"
        datastore: "{{ hostvars[vm_name].vm_datastore }}"

        # VM identity and template
        name: "{{ hostvars[vm_name].vm_name }}"
        template: "{{ hostvars[vm_name].vm_template }}"

        # Hardware configuration
        hardware:
          memory_mb: "{{ hostvars[vm_name].vm_memory_mb }}"
          num_cpus: "{{ hostvars[vm_name].vm_cpu }}"

        # Disk configuration
        disk:
          - size_gb: "{{ hostvars[vm_name].vm_disk_gb }}"
            type: thin
            datastore: "{{ hostvars[vm_name].vm_datastore }}"

        # Network with static IP (vSphere Guest Customization)
        networks:
          - name: "{{ hostvars[vm_name].vm_network }}"
            type: static
            ip: "{{ hostvars[vm_name].ip_address }}"
            netmask: "{{ hostvars[vm_name].ip_subnet_mask }}"
            gateway:
              - "{{ hostvars[vm_name].ip_gateway }}"
            dns_servers: "{{ hostvars[vm_name].dns_servers }}"

        # Windows guest customization
        customization:
          hostname: "{{ hostvars[vm_name].computer_name }}"
          joinworkgroup: "WORKGROUP"
          fullname: "Automation"
          orgname: "Lab"
          timezone: 110

        state: poweredon
        wait_for_ip_address: false
        wait_for_customization: true

      loop: "{{ win_client_hosts }}"
      loop_control:
        loop_var: vm_name
      register: win10_vms

    - name: Show resulting VM info
      debug:
        var: win10_vms
What this playbook actually does
This is a full provisioning workflow using VMware’s SOAP API:
- Clones from the template defined in
host_vars - Applies a static IP address via Guest Customization
- Injects the hostname
- Attaches the VM to the correct portgroup
- Defines CPU, RAM, and disk settings
- Places the VM in the correct folder, datastore, and cluster
- Starts the VM automatically
- Waits until customization is complete
And the key part:
All the parameters come from:
host_vars/HAM01AP001.yml
The playbook remains static and generic.
Why is this important?
In enterprise automation, you never duplicate logic.
A single provisioning playbook should be capable of deploying:
- 1 Windows 10 workstation
- 5 Windows Server domain controllers
- 100 application servers
- or 2000 machines in a VDI rollout
…simply by adding metadata files in host_vars.
This is the entire philosophy behind Ansible’s inventory architecture.
Running the playbook
From your Ansible environment (virtualenv active):
cd ~/infra-ansible
source .venv/bin/activate

ansible-playbook -i inventories/lab/inventory.yml \
  playbooks/provision/vmware_windows_client.yml \
  --ask-vault-pass
If everything is configured correctly, your VM appears in vSphere after 2–3 minutes with:
- the correct name
- the correct static IP
- the correct DNS
- the correct gateway
- and fully completed guest customization without errors
No manual sysprep.
No UI clicking.
No guessing.
Just clean automation.
Bootstrapping WinRM Through VMware Tools
After provisioning the VM, we have a fully customized Windows 10 machine running in vSphere — with a hostname, static IP, DNS settings, and VMware Tools operational. However, we still cannot manage it directly from Ansible, because Windows does not come with WinRM enabled by default.
We want Ansible to continue the workflow without any manual steps, so the solution must:
- run inside the guest OS
- without requiring WinRM yet
- without requiring credentials over the network
- and without logging into the Windows console
Luckily, VMware gives us exactly what we need.
Using vmware_vm_shell
This module executes commands inside the VM through VMware Tools, not over WinRM or SSH. That means:
- the VM doesn’t need to be reachable on the network
- firewall rules don’t matter yet
- WinRM can be activated entirely offline
- everything happens through the vSphere API
This is the ideal method for preparing Windows machines for remote management.
In our case, we will use PowerShell to:
- enable WinRM
- configure HTTP listener
- open firewall rules
- set up basic authentication
- restart the WinRM service
Once these steps are completed, the VM becomes accessible to Ansible through classic WinRM modules (ansible.windows.win_ping, win_command, win_feature, etc.).
The WinRM Bootstrap Playbook
Create the file:
playbooks/provision/bootstrap_winrm.yml
And add the following content:
---
# Enable WinRM inside Windows VMs using VMware Tools
# All VM-specific data is taken from host_vars for hosts in win_clients.

- name: Bootstrap WinRM on Windows VM via VMware Tools
  hosts: vcenter
  gather_facts: false
  collections:
    - community.vmware

  vars_files:
    - "../../inventories/lab/group_vars/vcenter.yml"

  tasks:

    - name: Collect Windows client hosts from inventory
      set_fact:
        win_client_hosts: "{{ groups['win_clients'] | default([]) }}"

    - name: Fail if no Windows client hosts are defined
      fail:
        msg: "No hosts found in win_clients group. Nothing to bootstrap."
      when: win_client_hosts | length == 0

    - name: Enable WinRM and open firewall via VMware Tools
      vmware_vm_shell:
        hostname: "{{ vcenter_hostname }}"
        username: "{{ vcenter_username }}"
        password: "{{ vcenter_password }}"
        validate_certs: "{{ vcenter_validate_certs | default(false) }}"

        vm_id: "{{ hostvars[vm_name].vm_name }}"
        vm_username: "{{ hostvars[vm_name].windows_admin_user }}"
        vm_password: "{{ hostvars[vm_name].win_local_admin_password }}"

        vm_shell: "C:\\Windows\\System32\\WindowsPowerShell\\v1.0\\powershell.exe"
        vm_shell_args: >
          -NoProfile -NonInteractive -ExecutionPolicy Bypass
          -Command "winrm quickconfig -force;
                    winrm set winrm/config/service/auth '@{Basic=\"true\"}';
                    Set-Item WSMan:\\localhost\\service\\AllowUnencrypted -Value true;
                    netsh advfirewall firewall add rule name='WinRM 5985' dir=in action=allow protocol=TCP localport=5985;
                    Restart-Service winrm"

        wait_for_process: true
      loop: "{{ win_client_hosts }}"
      loop_control:
        loop_var: vm_name
      register: winrm_bootstrap

    - name: Show vmware_vm_shell result
      debug:
        var: winrm_bootstrap
What this playbook actually does
When executed, Ansible connects to vCenter — not to Windows.
vCenter then uses VMware Tools to run a PowerShell command inside the VM:
- WinRM is enabled
- Basic auth is allowed
- The plaintext listener is permitted (lab-friendly)
- Firewall rules are created
- WinRM service is restarted
Once finished, the VM is ready for remote management.
cd ~/infra-ansible
source .venv/bin/activate

ansible-playbook -i inventories/lab/inventory.yml \
  playbooks/provision/bootstrap_winrm.yml \
  --ask-vault-pass
Testing WinRM Connectivity
After the bootstrap is complete, you can test it directly:
ansible -i inventories/lab/inventory.yml HAM01AP001 -m win_ping --ask-vault-passIf everything is configured correctly, you should see:
HAM01AP001 | SUCCESS => {
    "changed": false,
    "ping": "pong"
}
This confirms that:
- the VM is reachable
- WinRM is functional
- credentials from host_vars are correct
- Ansible is ready for post-provisioning steps
At this point, the machine is fully manageable through Ansible.
Why this approach is ideal
This method avoids:
- logging into the VM
- running scripts manually
- enabling WinRM via ISO/USB
- temporary network hacks
- or depending on DHCP connectivity
Everything is handled cleanly and remotely through vSphere — exactly how enterprises automate Windows deployments at scale.
Applying a Baseline Configuration to Windows 10
Now that WinRM is active and the VM is fully reachable from Ansible, we can finally start applying real configuration. This is where Windows stops being a black box and becomes an automated, predictable part of our infrastructure.
In this section, we’ll walk through a small but representative baseline:
- creating a directory on C:\
- installing a Windows optional feature
- (optionally) preparing for domain join later
This keeps the example simple, but demonstrates the entire end-to-end flow:
Ansible → WinRM → Windows → Expected Result
If this works, anything else you add later (software installs, registry changes, DSC, domain joins, compliance enforcement) will also work.
The Baseline Playbook
Create the file:
playbooks/configure/win10_baseline.ymlAnd add:
---
# Baseline configuration for Windows 10 clients

- name: Apply baseline configuration to Windows 10 client
  hosts: win_clients
  gather_facts: false
  collections:
    - ansible.windows
  vars_files:
    - "../../inventories/lab/group_vars/all/vault.yml"

  tasks:

    - name: Verify WinRM connectivity
      win_ping:

    - name: "Create tools directory on C:"
      win_file:
        path: "C:\\Tools"
        state: directory

    - name: "Create marker file in C:\\Tools with timestamp"
      win_shell: |
        $ts = Get-Date -Format "yyyy-MM-dd HH:mm:ss"
        "Baseline applied via Ansible on $ts" | Out-File -FilePath "C:\Tools\baseline.txt" -Encoding UTF8

    - name: "Ensure WinRM service is running and set to Automatic"
      win_service:
        name: WinRM
        start_mode: auto
        state: started
What This Playbook Demonstrates
This baseline might look simple, but it proves the most important things:
• Ansible can reach the VM over WinRM
Connectivity works, credentials work, and firewall/WinRM configuration is solid.
• Windows responds reliably to automation
Creating directories, writing files, running PowerShell — all executed cleanly.
• The VM is now a fully manageable node
From here you can layer anything:
– install applications
– tune Windows settings
– join the VM to Active Directory
– enforce baselines and compliance
– deploy scripts or agents
– prepare golden images
And all future work uses the same structure — host_vars → playbook → results.
Running the Baseline
From the project root:
cd ~/infra-ansible
source .venv/bin/activate

ansible-playbook -i inventories/lab/inventory.yml playbooks/configure/win10_baseline.yml --ask-vault-pass
Here’s what you should expect when running it:
• The WinRM connectivity check succeeds (ok).
• The C:\Tools directory is created (changed on the first run).
• A baseline.txt marker file appears inside C:\Tools (changed).
• The WinRM service is confirmed to be running and set to Automatic (ok or changed).
The exact formatting may vary depending on your Ansible callback plugin,
but the key point is that the play finishes cleanly and the expected files show up on the VM.
From here, expanding the baseline is straightforward — installing applications, joining the domain, applying security policies, running scripts, or building consistent Windows images all follow the same structure.
Joining Windows 10 to Active Directory
Once our Windows 10 VM is provisioned, bootstrapped, and reachable over WinRM, the next natural step is to integrate it into the domain. In an enterprise environment, this is where a “machine” officially becomes a “workstation”. Without domain join, you’re practically stuck in standalone-land — no policies, no central credentials, no management.
Fortunately, Ansible makes this step predictable and repeatable.
In this chapter we’ll:
- extend the
host_varswith domain credentials - create a dedicated playbook for domain join
- reboot automatically after completion
- verify that the join succeeded
This completes the workflow from raw VM → fully integrated domain member.
Extending host_vars With Domain Credentials
Add the following to your VM’s variable file:
inventories/lab/host_vars/HAM01AP001.yml# Active Directory domain to join
domain_name: "corp.local"
domain_admin_user: "CORP\\Administrator"
# Password stored securely in Vault
domain_admin_password: "{{ vault_domain_join_password }}"These settings are host-specific, which is why they belong in host_vars.
All sensitive values continue to live inside Vault (vault_domain_join_password).
The AD Join Playbook
Create:
playbooks/configure/win10_domain_join.ymlAnd add:
---
# Join Windows 10 client to Active Directory

- name: Join Windows 10 client to Active Directory
  hosts: win_clients
  gather_facts: false
  collections:
    - microsoft.ad
    - ansible.windows
  vars_files:
    - "../../inventories/lab/group_vars/all/vault.yml"

  tasks:

    - name: Verify WinRM connectivity before attempting domain join
      win_ping:

    - name: "Ensure C:\\Tools exists (safety check)"
      win_file:
        path: "C:\\Tools"
        state: directory

    - name: Join machine to domain
      microsoft.ad.membership:
        hostname: "{{ computer_name }}"
        dns_domain_name: "{{ domain_name }}"
        domain_admin_user: "{{ domain_admin_user }}"
        domain_admin_password: "{{ domain_admin_password }}"
        state: domain
        reboot: false
      register: domain_join_result

    - name: Reboot if domain join requires it
      win_reboot:
        msg: "Rebooting to complete domain join"
        timeout: 600
      when: domain_join_result.reboot_required | default(false)
Why This Works Reliably
1. microsoft.ad.membership is the replacement for the deprecated win_domain_membership module.
It’s fully maintained and works on Windows 10, 11, and all supported Windows Server versions.
2. Domain join logic is fully idempotent.
If the machine is already joined, the playbook reports ok instead of triggering a join.
3. Automatic reboot handling.
Windows almost always needs a reboot after joining a domain — Ansible detects this and reboots only when necessary.
Running the AD Join
From the project root:
cd ~/infra-ansible
source .venv/bin/activate

ansible-playbook -i inventories/lab/inventory.yml playbooks/configure/win10_domain_join.yml --ask-vault-pass
Expected output:
- TASK [Verify WinRM connectivity before attempting domain join] → ok: [HAM01AP001]
- TASK [Ensure C:\Tools exists (safety check)] → ok: [HAM01AP001]
- TASK [Join machine to domain] → changed: [HAM01AP001]
- TASK [Reboot if domain join requires it] → changed: [HAM01AP001] (if a reboot is needed)
After reboot, you should be able to log in with a domain account (e.g., CORP\User).
This completes the transformation from:
freshly deployed VM → domain-integrated workstation
with no manual interaction.
Bringing It All Together: The Full Windows 10 Provisioning Runbook
Up to this point in our automation journey, we built everything in small, clean blocks:
- we provisioned a Windows 10 VM from a vSphere template
- we bootstrapped WinRM using VMware Tools
- we applied a baseline configuration
- we joined the machine to Active Directory
Each piece worked individually — great for development, testing, and debugging.
But in real infrastructure, nobody wants to run four playbooks by hand.
What we want is the DevOps equivalent of a lightsaber: press one button, and the whole workflow slices through everything from zero to a fully configured domain workstation.
So let’s build exactly that.
A runbook.
Think of it as the orchestrator: it doesn’t do the work itself, but it knows which sub-playbooks to call, in what order, and under what conditions.
Why a Runbook?
A runbook gives you:
- one entry point for your entire provisioning workflow
- a clean separation between logic (runbook) and implementation (playbooks)
- the ability to drop it into CI/CD with zero changes
- consistency: every VM goes through the same steps, the same way, every time
- easier debugging — each step is still its own playbook
It’s how large automation frameworks stay maintainable over time.
The Windows 10 Full Provisioning Runbook
Create the file:
playbooks/runbooks/win10_full_deploy.ymlAnd add:
---
# Full provisioning runbook for Windows 10 clients
# Steps:
#   1. Provision VM in vSphere
#   2. Bootstrap WinRM via VMware Tools
#   3. Apply baseline configuration
#   4. Join to Active Directory

- name: Provision Windows 10 VM
  import_playbook: "../provision/vmware_windows_client.yml"

- name: Bootstrap WinRM on newly deployed Windows VM
  import_playbook: "../provision/bootstrap_winrm.yml"

- name: Apply Windows 10 baseline configuration
  import_playbook: "../configure/win10_baseline.yml"

- name: Join Windows 10 to Active Directory
  import_playbook: "../configure/win10_domain_join.yml"
Yes — that’s everything.
Simple on the outside, powerful on the inside.
Each component stays testable and reusable, but when combined, they form a complete, end-to-end Windows provisioning pipeline.
Running the Runbook
From the project root:
cd ~/infra-ansible
source .venv/bin/activate

ansible-playbook -i inventories/lab/inventory.yml playbooks/runbooks/win10_full_deploy.yml --ask-vault-pass
What happens next:
- A brand-new VM is created in vSphere
- VMware Tools executes a PowerShell script to activate WinRM
- Ansible connects via WinRM and applies baseline configuration
- The VM joins the domain and reboots
- You log in with a domain account, and everything “just works”
This is the moment where the project stops being just a bunch of playbooks…
and becomes real operational automation.
Wrap-Up: Windows Provisioning Fully Automated
In this part, we completed the entire lifecycle of deploying a Windows 10 VM using Ansible and VMware:
- cloned the VM from a vSphere template using OS customization
- bootstrapped WinRM remotely through VMware Tools
- verified full remote execution via Ansible
- applied a baseline configuration
- joined the machine to Active Directory
- confirmed that everything works end-to-end
At this point, Windows provisioning is no longer a manual task — it’s fully automated, reproducible, and ready to scale.
So what’s next?
In the next article, we’ll extend the framework beyond Windows and start provisioning and configuring Linux systems (Debian and RedHat). We’ll look at SSH key injection, cloud-init-like setups, OS-specific roles, and how to reuse the same repository structure for multiple platforms.