
This will be the first post out of series of posts about creating a smart home system with Raspberry Pi, different kind of sensors and the powerful visual tool for wiring sensor data – Node-RED.
Node-RED is a flow-based development tool for visual programming for wiring together hardware devices, APIs and online services in new and interesting ways. It provides a browser-based editor which can be used to wire together flows using the wide range of nodes in the palette.
Today I would like to show you the logic and the first steps in creating this smart home system. Raspberry Pi is the central device that will collect, interpret and display graphically the data received from the sensors and will also control the relays/contacts connected to it. I’ve used in my projects Raspberry Pi Zero W because is very compact and in the same time has enough power to run this kind of systems . As wi-fi modules for transmitting/receiving data to/from Raspi, I am using ESP8266 ESP-01 and ESP8266 D1 mini.
Here is the logical diagram of the system.
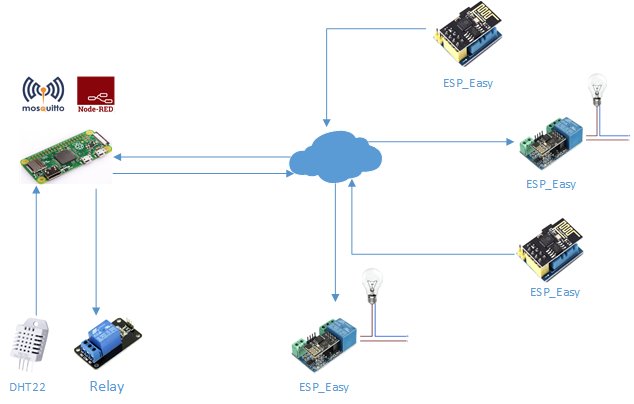
Raspberry Pi Zero is running Node-RED and the mqtt broker – mosquitto.
MQTT (MQ Telemetry Transport or Message Queuing Telemetry Transport) is a lightweight, publish-subscribe network protocol that transports messages between devices. The protocol usually runs over TCP/IP. It is designed for connections with remote locations where a “small code footprint” is required or the network bandwidth is limited.
As you can see in the diagram, the sensors and relays could be connected directly to the GPIO pins of the Raspi or via wi-fi using mqtt protocol mentioned above.
Now that we presented the logic, I would like to go ahead and show you how to prepare the Raspberry Pi.
Requirements:
1. Raspberry Pi Zero W
2. SD Card – minimum 16GB
3. Power supply for Raspberry
Step one – install Raspberry Pi OS on Raspberry Pi Zero W
1. Download Raspberry Pi OS (32-bit) with desktop and recommended software (zip file) from this link – https://www.raspberrypi.org/downloads/raspberry-pi-os/.
2. Unzip the zip file using 7zip.
3. Insert SD Card into the Laptop/card reader
4. Write iso file using Win32Disk Imager. Select the SD Card partition (E:\ in my case) and the unpacked img file – 2020-05-27-raspios-buster-full-armhf.img and then press Write.
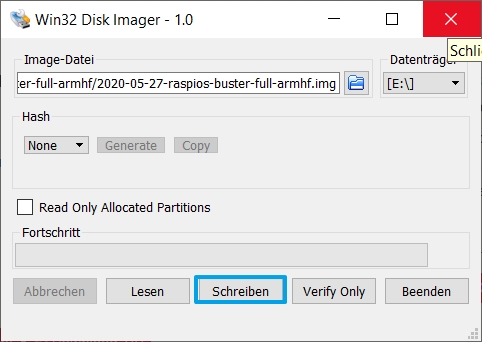
Wait around 8-10 minutes and the SD card will be ready.
5. Once done, open Windows Explorer, access the E:\ partition and create a file named wpa_supplicant.conf

open it with Notepad++ , convert it to Unix (LF)
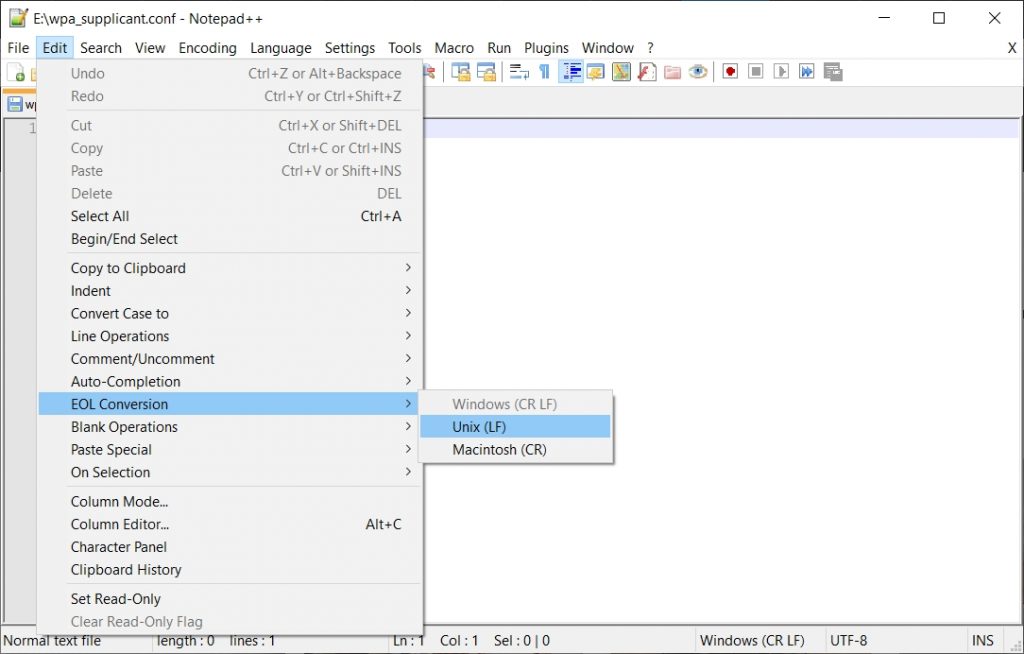
and add the following text:
country=de
update_config=1
ctrl_interface=/var/run/wpa_supplicant

network={
 scan_ssid=1
 ssid="MyNetworkSSID"
 psk="Pa55w0rd1234"
}
Replace ssid and psk with your SSID name and your password and save it. Raspberry Pi will use this file to connect to the wi-fi AP.
6. To enable SSH, create on partition E:\, a file named ssh (without any extension). There is no need to add any text in this file, leave it empty.

Step two – connect to Raspberry Pi and update it
1. Remove the card from card reader, introduce it to Raspberry Pi and power it up.
2. Wait a few minutes, then Raspberry Pi should be connected to Wi-Fi AP and you should be able to connect to it via SSH.
Default username is pi and the password is raspberry.
3. After successfully login, please change the default password.
pi@raspberrypi:~ $ sudo passwd pi
New password:
Retype new password:
passwd: password updated successfully
4. Update repository and then upgrade the installed packets using following commands.
pi@raspberrypi:~ $ sudo apt-get update
pi@raspberrypi:~ $ sudo apt-get upgrade
5. After upgrade, reset Raspi
pi@raspberrypi:~ $ sudo reboot
Step three – install Node-RED
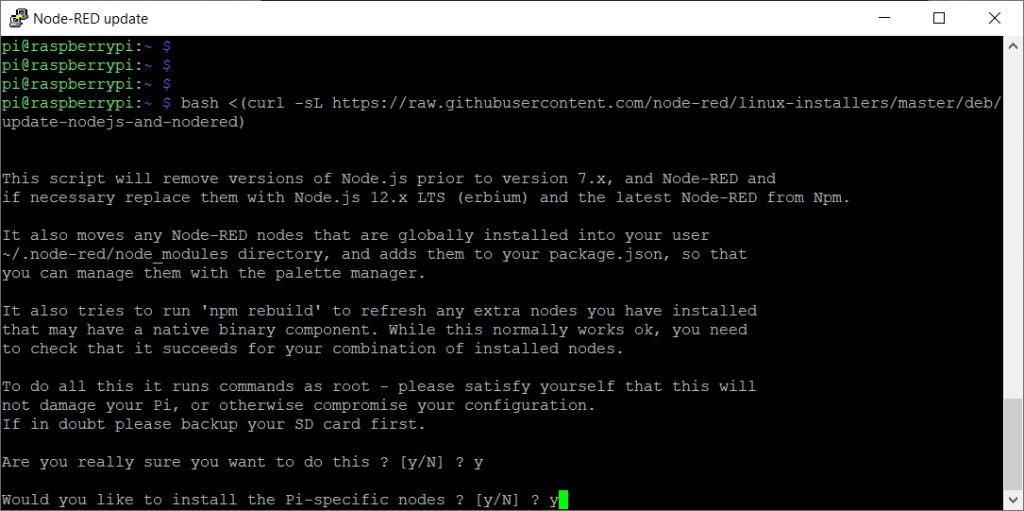
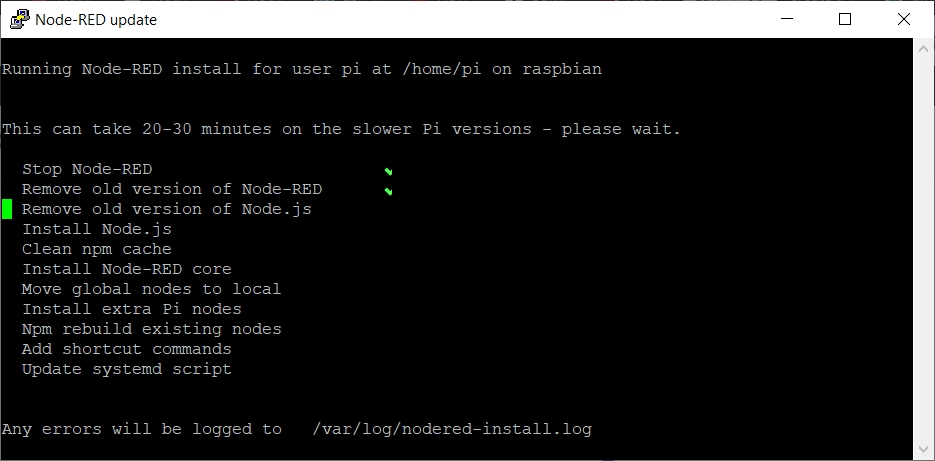
1. Login back to Raspi and issue the following command to install Node-RED:
bash <(curl -sL https://raw.githubusercontent.com/node-red/linux-installers/master/deb/update-nodejs-and-nodered)
2. Answer yes to Are you really sure you want to do this and Would you like to install the Pi-specific nodes?
3. Add this command to start Node-RED at startup:
pi@raspberrypi:/usr/bin $ sudo systemctl enable nodered.service
Created symlink /etc/systemd/system/multi-user.target.wants/nodered.service → /lib/systemd/system/nodered.service.
Step four – Install Node-RED Dashboard
This provides a set of nodes in Node-RED to quickly create a live data dashboard.
1. Start Node-RED with command:
pi@raspberrypi:~ $ node-red-start
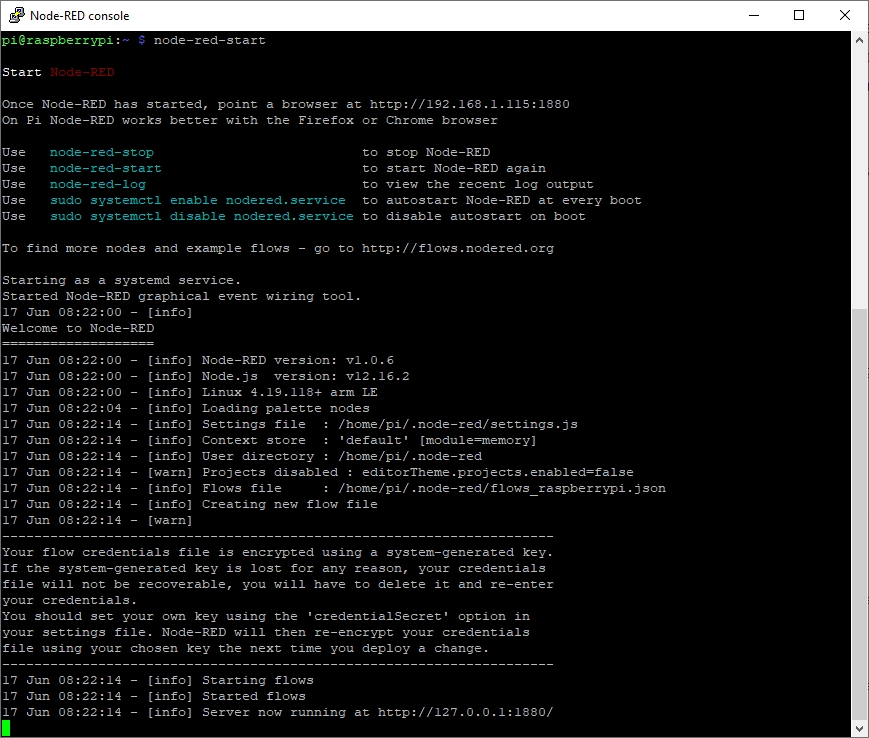
2. Point a browser at http://Raspberry-IP-Address:1880
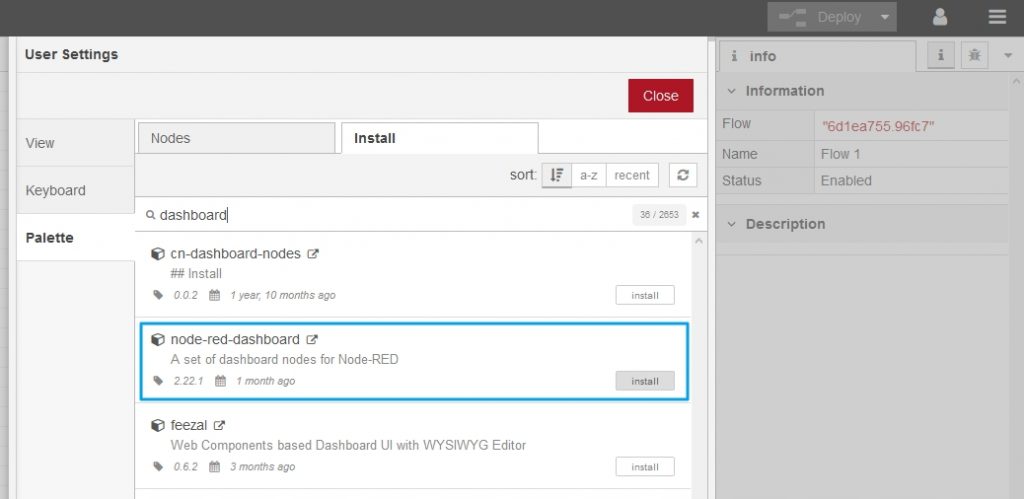
3. Once in Node-RED, go to the Menu in the right-top corner and access Manage palette

4. Select Install tab, search for dashboard and install node-red-dashboard
Step five – Secure Node-Red
1. Install node-red-admin command line tool to generate a password hash.
npm install -g --unsafe-perm node-red-admin
2. Generate password hash
pi@raspberrypi:~ $ sudo node-red-admin hash-pw
Password:[insert password]
$2b$08$rDXofaBQ3H5fRFBfAqOWW.gGPWnBwOr0swXXeu183m
3. Edit ~/.node-red/settings.js to set a password for management interface – username admin and dashboard – username user. Uncomment folowing block of code and replace password hash with the one generated at the previous step.
For management interface, username admin:
    adminAuth: {
        type: "credentials",
        users: [{
            username: "admin",
            password: "$2b$08$rDXofaBQ3H5fRFBfAqOWW.gGPWnBwOr0swXXeu183m",
            permissions: "*"
        }]
    },
For Dashboard, username user. Will use the same pasword hash:
httpNodeAuth: {user:"user",pass:"$2a$08$7B4EeF6HMnsk9m23cxBMH.X2nSkY3q1MmmsBip5h.zSJbzp/EBdsu"},
httpStaticAuth: {user:"user",pass:"$2a$08$7B4EeF6HMnsk9m23cxBMH.X2nSkY3q1MmmsBip5h.zSJbzp/EBdsu"},
4. In order for the changes to take effect, restart node-red.
Step six (optional) – Activate Debug in case of problems
In case of problems,you can increase the level of logs to debug.
1. Edit settings file – ~/.node-red/settings.js. Change level from info to debug and restart Node-RED.
    // Configure the logging output
    logging: {
        // Only console logging is currently supported
        console: {
            // Level of logging to be recorded. Options are:
            // fatal - only those errors which make the application unusable should be recorded
            // error - record errors which are deemed fatal for a particular request + fatal errors
            // warn - record problems which are non fatal + errors + fatal errors
            // info - record information about the general running of the application + warn + error + fa$
            // debug - record information which is more verbose than info + info + warn + error + fatal e$
            // trace - record very detailed logging + debug + info + warn + error + fatal errors
            // off - turn off all logging (doesn't affect metrics or audit)
            level: "debug",
            // Whether or not to include metric events in the log output
            metrics: false,
            // Whether or not to include audit events in the log output
            audit: false
        }
    },
Step seven – Install MQTT Broker
Install MQTT Broker mosquitto to be able to communicate between the sensors and Raspberry Pi via wi-fi.
pi@raspberrypi:~ $ sudo apt-get install mosquitto mosquitto-clients -y
Conclusion
I will end here the first post of the series. We’ve learned about the logic of the system, the components and how to prepare the software for the central server – Raspberry Pi. In the next post we’ll see how to configure the client side of the system – the sensors and relays.
Thank you for the tutorials, I find them very useful. I really enjoyed the article about SSH reverse tunneling when you have a Raspberry with 3G connection. After reading about NodeRed, I have a question: NodeRed dashboard is normally on “ip_address:1880/ui”, but can you see it with SSH reverse tunneling?
I’m glad you find them useful. In regard to your question – yes you do, this is why I’m actually using reverse ssh, to access the node-red dashboard. Please check in the ssh reverse tunneling post, I’ve added an update at the end of the Step Four.